
Autoclaves

When the autoclave is started, the heater heats the sterilization water, and the temperature inside the chamber rises due to the steam generated. The temperature sensor on the chamber wall detects the ambient temperature of the temperature sensor, which is shown on the control panel display during operation (hereafter “chamber temperature”). After the chamber temperature reaches the set temperature, the sterilization process starts.
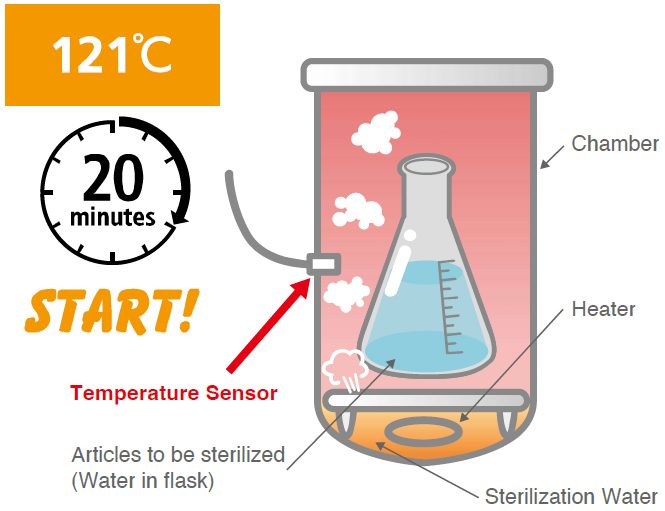
The articles to be sterilized are also heated by the steam generated inside the chamber and their temperature rises. The rate of temperature rise varies depending on the quantity, material, shape and accommodation way of the articles to be sterilized. In the sample case shown in the above figure, the more water there is, the longer it takes for the temperature to rise.
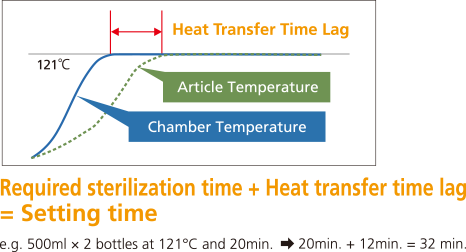
At this point, the chamber temperature has reached the set temperature, however the articles to be sterilized may not have reached the set temperature.
This is called “Heat Transfer Time Lag”.
Even if the articles to be sterilized have not reached the set temperature, the sterilization process may start when the chamber temperature reaches the set temperature. This may result in insufficient sterilization and BI test failure. For secure sterilization, it is recommended to add the Heat Transfer Time Lag to the sterilization time.
For details on “Heat Transfer Time Lag” and reference times, check below.
Heat Transfer Time Lag
FLS-1000 >
SX-700 / 500 / 300, SX-700E / 500E / 300E >
For measures of “Heat Transfer Time Lag” for secure sterilization, check below.
External Temperature Sensor
FLS-1000 >
SX-700 / 500 / 300, SX-700E / 500E / 300E >

After using the Autoclave, do you drain the water and clean the chamber?
If samples spilled from culture media or waste remain inside, they will become stuck to the bottom of the chamber and cause clogging the drainpipe, preventing water from flowing smoothly.
In such cases, clear the clog and clean the chamber according to the video instruction.
Draining the sterilization water and cleaning the chamber after each use is a key tip to prevent drainpipe clog and extend the product's lifespan.
For Autoclave preventive maintenance, check below also.
What should we do to clean the Autoclave >
Refer to “Replacing the chamber lid gasket” in the operator's manual.
See the following video additionally with the operator’s manual.
* The chamber lid gasket plays an important role in maintaining air-tightness of the pressure chamber. If any deterioration or damage is found, replace with a new one.
When using Autoclave, the display shows the ambient temperature inside the chamber, but the temperature of articles to be sterilized arrives later than the display temperature. This is called “Heat Transfer Time Lag”.
It is recommended to add the Heat Transfer Time Lag to the sterilization time for more secure sterilization.
For details, please check the Heat Transfer Time Lag test data below.
FLS-1000 >
SX-700 / 500 / 300, SX-700E / 500E / 300E >
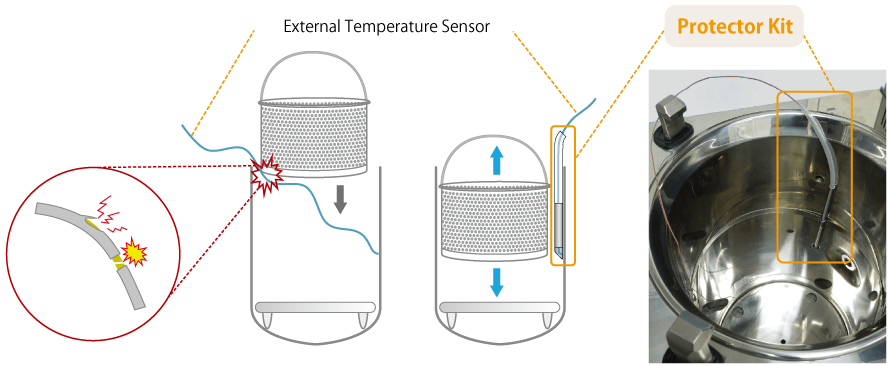
One method is to use the Protector Kit for External Temperature Sensor.
For details, please check the Protector Kit for External Temperature Sensor.
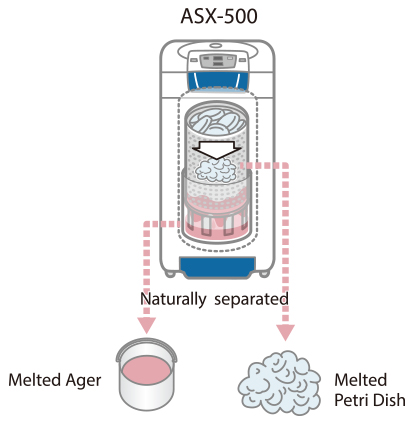
TOMY autoclaves have an optional separator kit that naturally separates petri dishes and liquid during the sterilization process.
![]() Separator Kit for Disposal Petri Dish
Separator Kit for Disposal Petri Dish
Put petri dishes with the medium remained directly into the long basket of Separator Kit.
The medium that melts during sterilization falls into the bucket below, while the petri dish remains in the basket to be separated.
For details, including a video on how to use the kit, please check Separator Kit for Disposal Petri Dish.
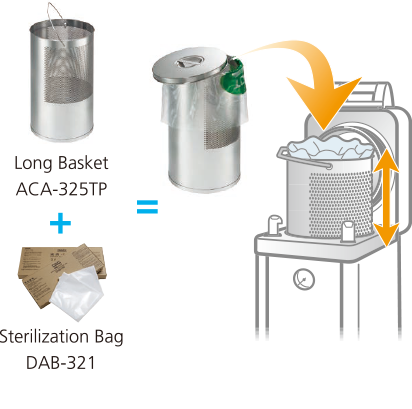
If you sterilize wastes daily using sterilization bags, the optional Waste-bin Kit can be used in combination with the bag as if it were a "whole sterilizable waste-bin".
![]() Waste-bin Kit
Waste-bin Kit
For details, please check Waste-bin Kit.
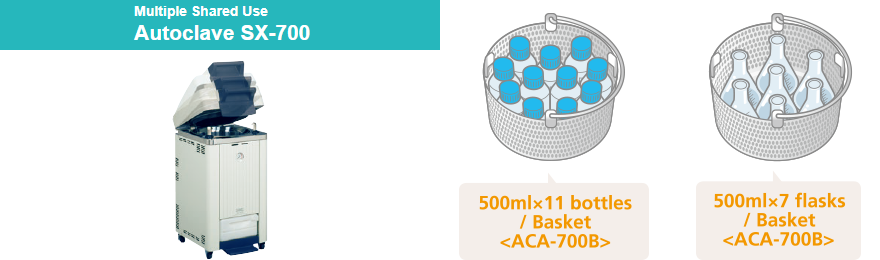
Here are some examples of accommodations for familiar items for each model.
In the case of Multiple Shared Use Autoclave SX and SX-E series, approximately 500ml × 11 bottles or 500ml × 7 flasks can be accommodated. For details, please check Checking the Loading Capacity.
In the case of High-throughput Autoclave FLS-1000, 5L × 4 flasks can be accommodated.
For details, please check High-throughput Liquid Sterilization.
You can also see the video Flask Stand for FLS-1000.

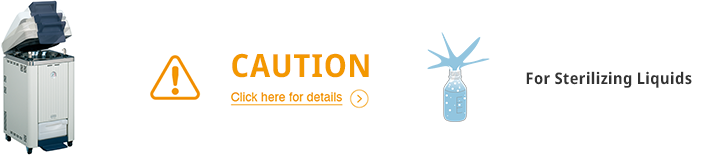
When sterilizing liquids and bottles, please be careful to avoid burns and accidents.
For details, please check SAFETY NOTICE for Autoclave ( Warnings for Sterilizing Bottles and Containers, Cautions for Sterilizing Liquids )
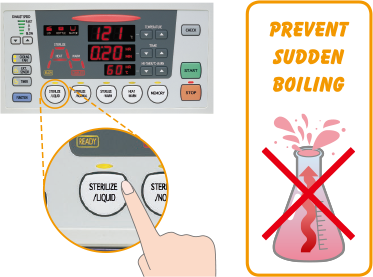
One method is to use a liquid sterilization course to prevent sudden boiling.*
For details, please check Attentive Liquid Sterilization Course.
Please note that it is not possible to completely prevent this depending on the type and amount of liquid, sterilization conditions, etc.
Also, please check the SAFETY NOTICE below.
Cannot be used with standard Autoclaves.
Optional programs for high altitude are available for SX series Autoclaves.
For details, please check High Altitude Sterilization Program.

Disconnect the power supply by switching off the leakage breaker and power supply switch, and unpluging the power plug. Do this when the chamber temperature is sufficiently low.
<Drain water after use>
Drain both sterilized water in the chamber and water in the exhaust bottle / tank after use.
Clean the inside of chamber.
<Clean the inside of chamber>
Gently remove the bottom plate from inside the chamber. Remove contaminants and clean the sinside of chamber using a soft cloth moistened with mild detergent. Rinse detergent and contaminants thoroughly with water and drain water.
Be careful not to distort the sensors in the chamber during cleaning.
<Cleaning the main body>
Remove contaminants using a soft cloth moistened with mild detergent. Wipe off detergent using a tightly wrung-out damp cloth.
For details, please refer to the operation manual that came with each model you are using.


